
Covers everything from setting up a fan page, through designing your cover and the look and feel of your page, to adding fans and creating dynamic content.
Table Of Contents
Setting Up Your Facebook Fan Page
Customizing Your Facebook Fan Page
- Setting Up A Cover Photo With Pagemodo
- Edit The Page
- Editing Your Facebook Info
- Editing Your Facebook Settings
- Editing Your Admin Roles
- Facebook Apps
- Facebook Custom Tabs
Building Your Facebook Audience
Facebook Updates
- 14 Types of Updates That Will Increase Engagement
Facebook Ads
Facebook Events
Integrate Facebook With Other Marketing
Published December 2013. Copyright 2013 James Publishing.
Creating a strong Facebook fan page for clients takes work, but done right it will help bring in clients for your firm.
How would that work then? This is the question we will help you answer with our comprehensive Facebook Fan Pages for Lawyers eBook. We will cover everything from setting up a fan page, through designing your cover and the look and feel of your page, to adding fans and finally creating dynamic content to engage your fans and encourage them to take action.
Setting Up Your Facebook Fan Page
To set up a Facebook fan page, you first need to create a Facebook account. Set the account up now, if you do not already have one, at https://www.facebook.com.
Once your account is set up, go to https://www.facebook.com/pages/.

At the top of the page, click on the Create Page button.
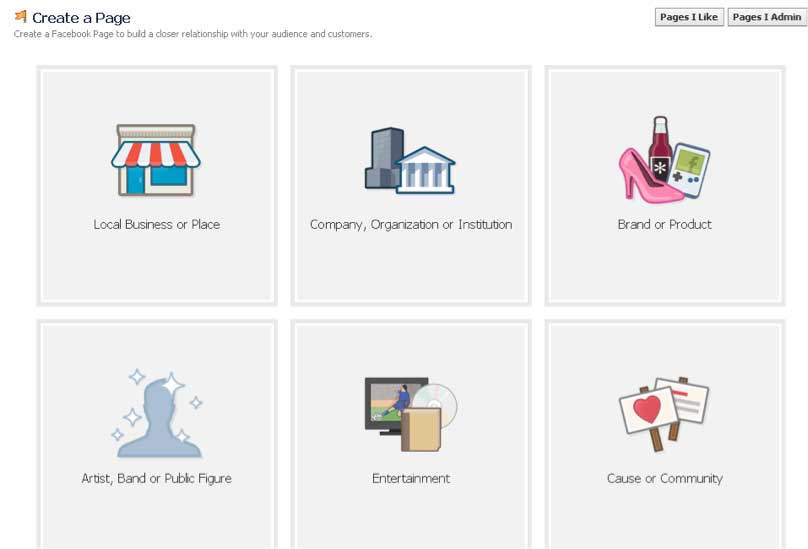
Next, choose the type of Fan Page you want to create. If you have never created a fan page before then create a company page (Company, Organization, or Institution) first. Facebook allows you to create an unlimited number of pages, but then you will have to manage them to make sure they are useful. While a major brand like Disney can have 100 fan pages, a small to medium size law firm will find it sufficient to have one page.
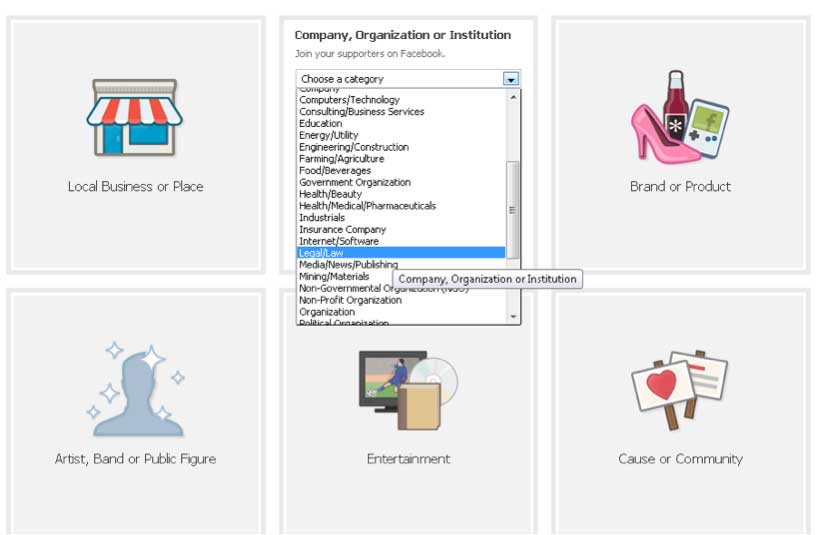
Use the drop down menu to find Lawyers, and then type in your company name. Finally, click the box to agree to Facebook Page Terms.
Read the terms at https://www.facebook.com/terms_pages.php, if you want a Facebook page you must agree to their terms.
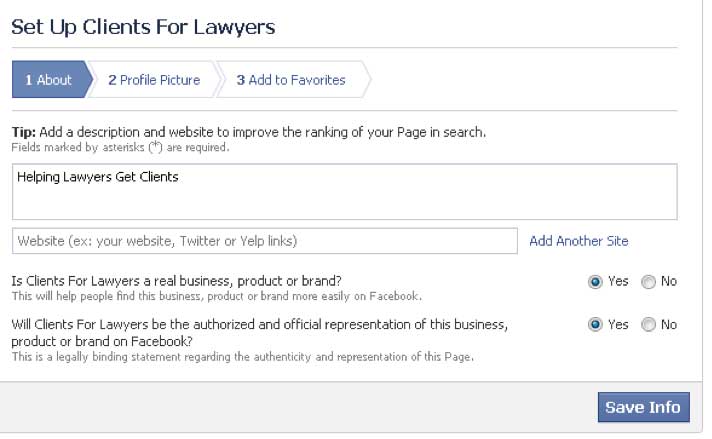
Step 1: About – This step is basic. You need to enter your basic page details, such as the page description and your website URL. Also, be sure to select yes, if you are creating a page for a company that you officially represent and/or own.
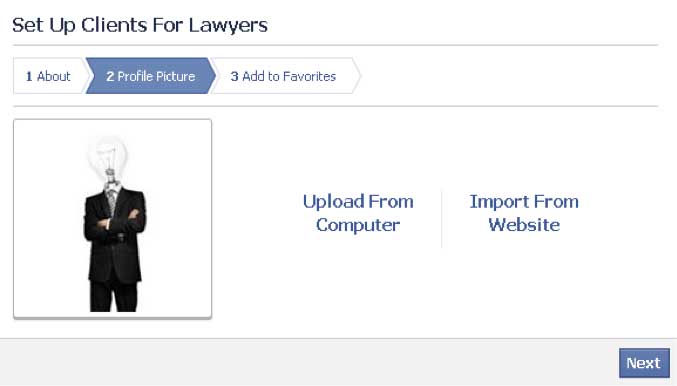
Step 2: Profile Picture – Next you need to add a profile picture to your page. While this step is not required, we recommend you take advantage of it. You can upload a photo of your logo or a more personal photo of you or someone from your company. Profile pictures should be 180×180 pixels.
Step 3: Add To Favorites – The third step is where you add the new Facebook Fan Page to your favorites on the left hand side of your Facebook page. That way you can monitor your fan page closely when you are on the site. This is optional.

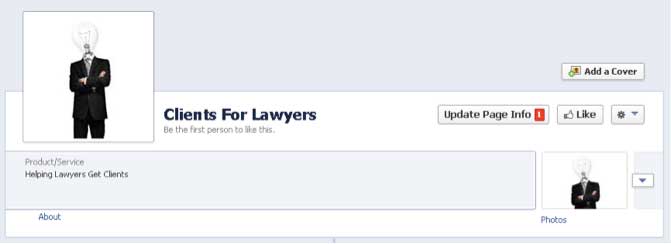
Congratulations! Your Fan Page is set up. Now we need to customize the page to attract new fans.
Customizing Your Facebook Fan Page
Once you navigate to your Facebook page, you will see the admin panel first. This is where you will be able to make many of the internal, behind the scenes edits that we will discuss later in this section.
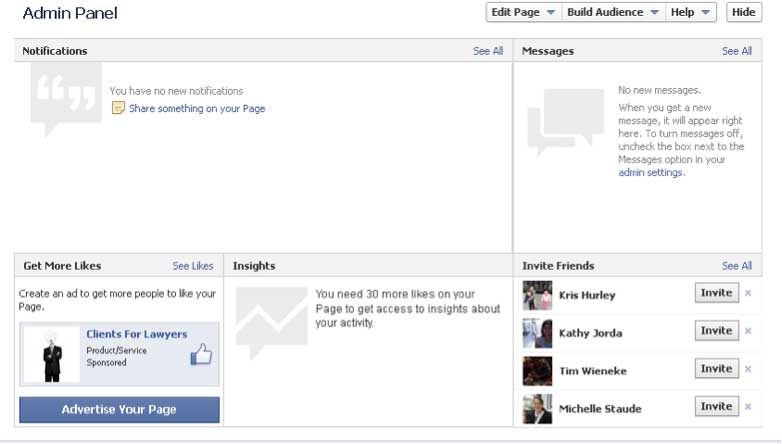
The first thing we need to do is edit the cover photo.

Cover photos must be at least 399 pixels wide.
To edit this, you have a few different options.
- If you have a web designer then you will want to have them create a cover for you.
- Upload a generic stock image or a current photo of your firm.
- You can also use online Facebook cover design software. Here are two options:
Setting up a Cover Photo with Pagemodo
Step 1: Sign up using Facebook registration.
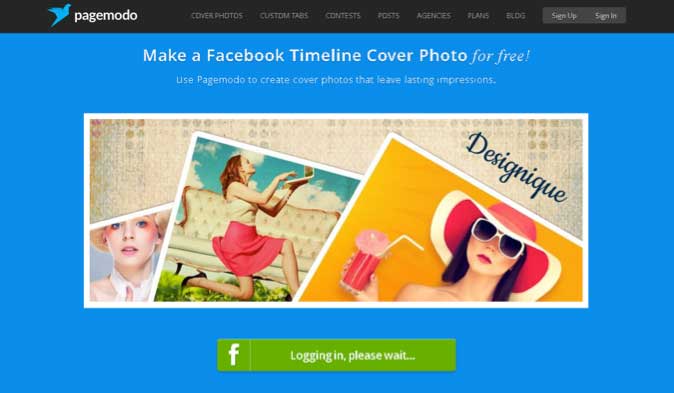
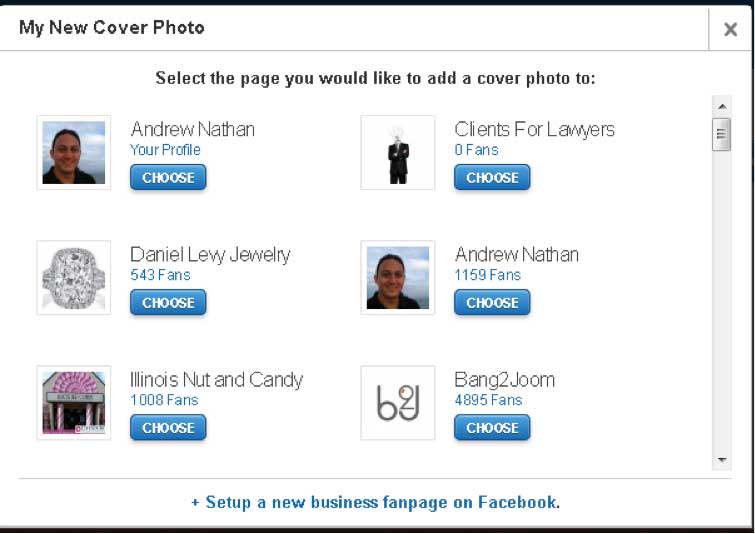
Step 2: Connect to the correct page or profile.
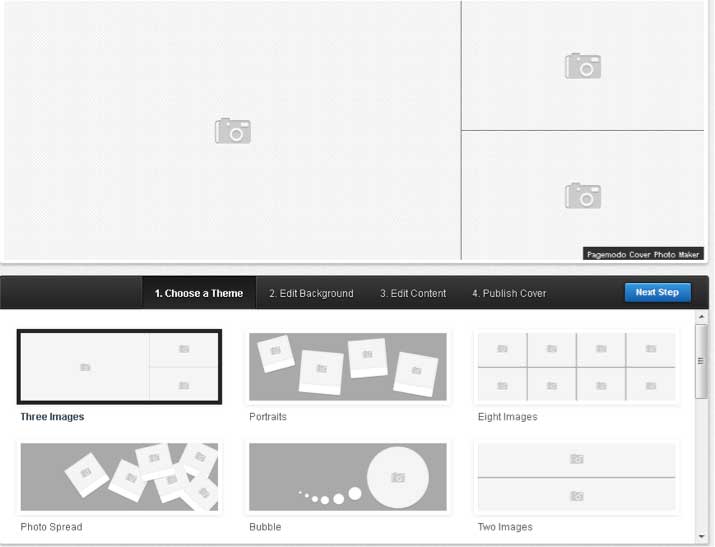
Step 3: Choose a theme.
Step 4: Edit the background.
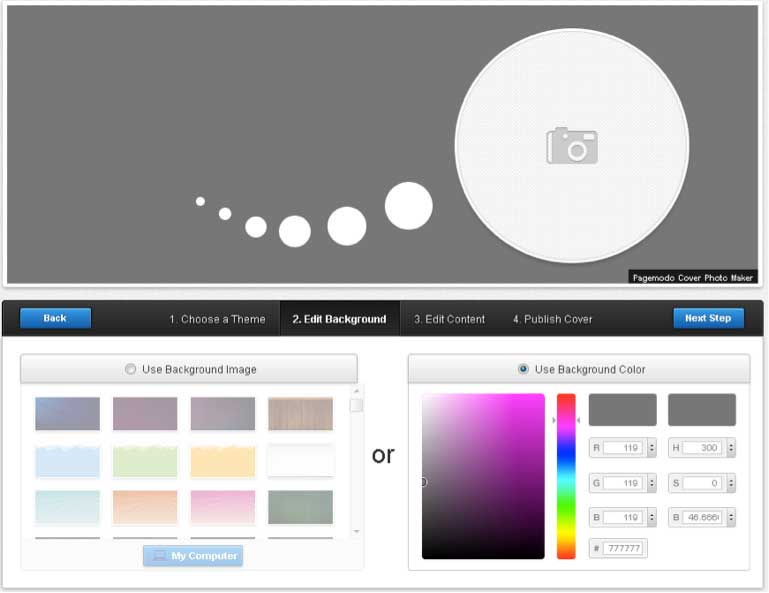
Step 5: Edit the content and image.
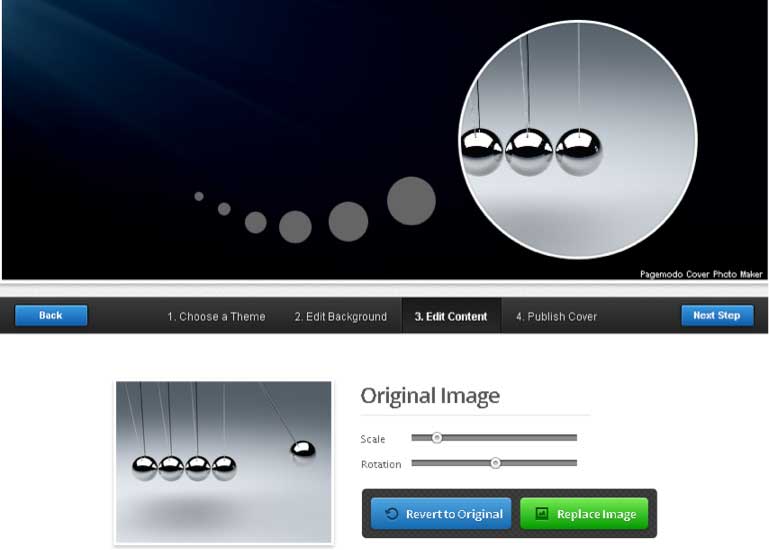
Step 6: Publish the cover.
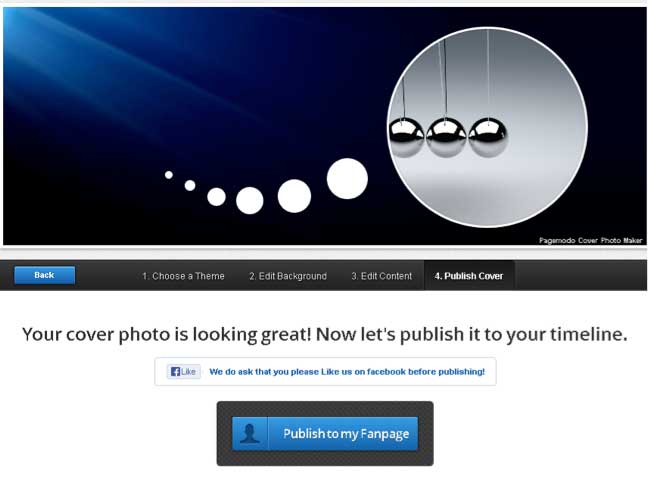
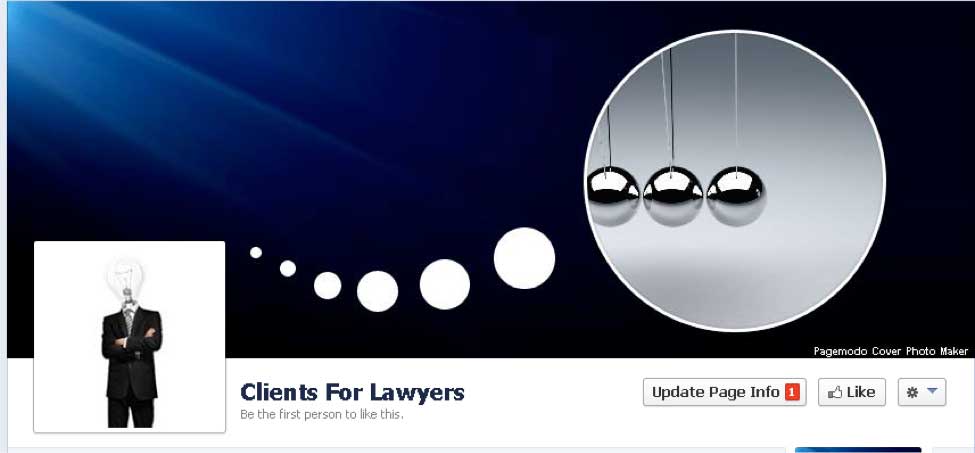
Step 7: Double check the cover photo looks right on Facebook.
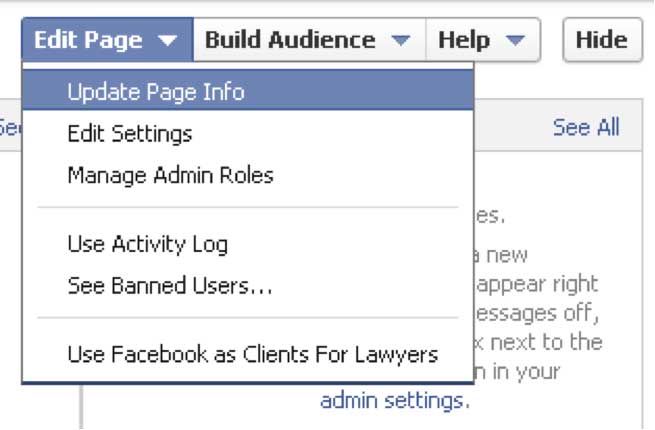
Edit the Page
To edit your fan page, go to the top of your page admin located above the cover photo on your fan page. You will see a drop down menu titled Edit Page. From here, you can access the back end of your Facebook page to make changes, and get a detailed accounting of different marketing methods you can use through apps as well as other tools Facebook gives to Fan Page owners.
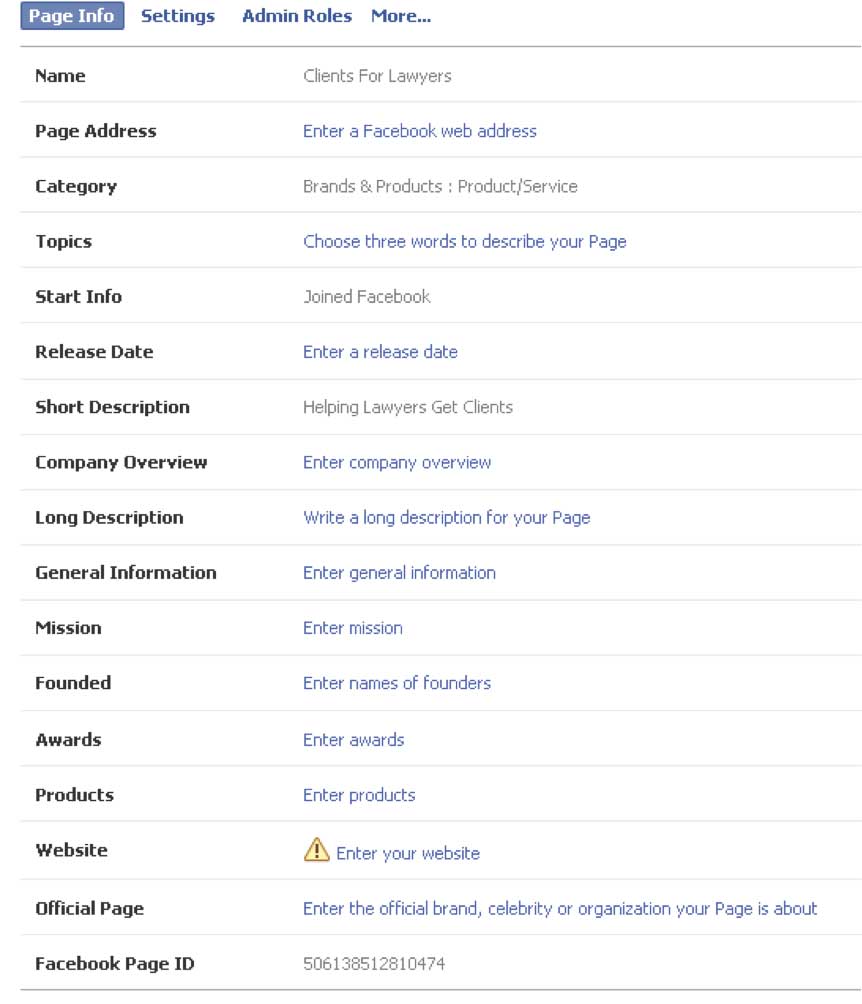
Editing Your Facebook Page Info
Most of the items editable under the Page Info section (see example below) are straightforward like Name, Category, Website, and Page Overview. The Facebook Username and Facebook Official Name can be a bit more challenging to change. The process is simple to do, but Facebook puts you through the wringer to change the name after you create a name.
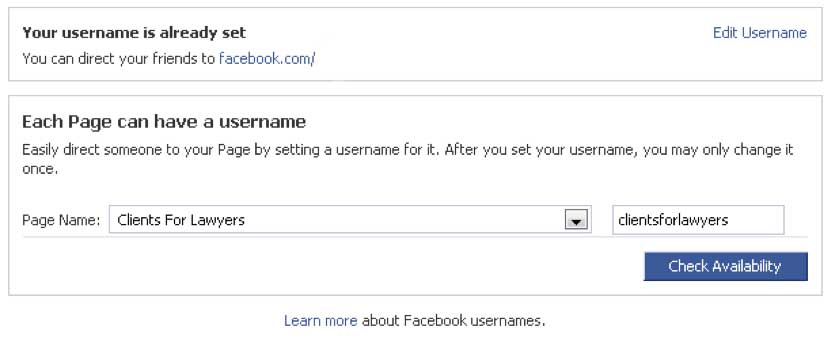
For example, although setting up a Facebook Username is a basic process; your fan page must have 30 or more fans before Facebook will allow you to set up a custom name.
This is why the Page Address line is a bit misleading. Yes, you can use it to create a custom Facebook page name for your new page; however, before you create a custom name, you need at least 30 fans. Also, make sure the name is correct the first time, because Facebook gives you one chance to change the name over the course of your Fan Page.
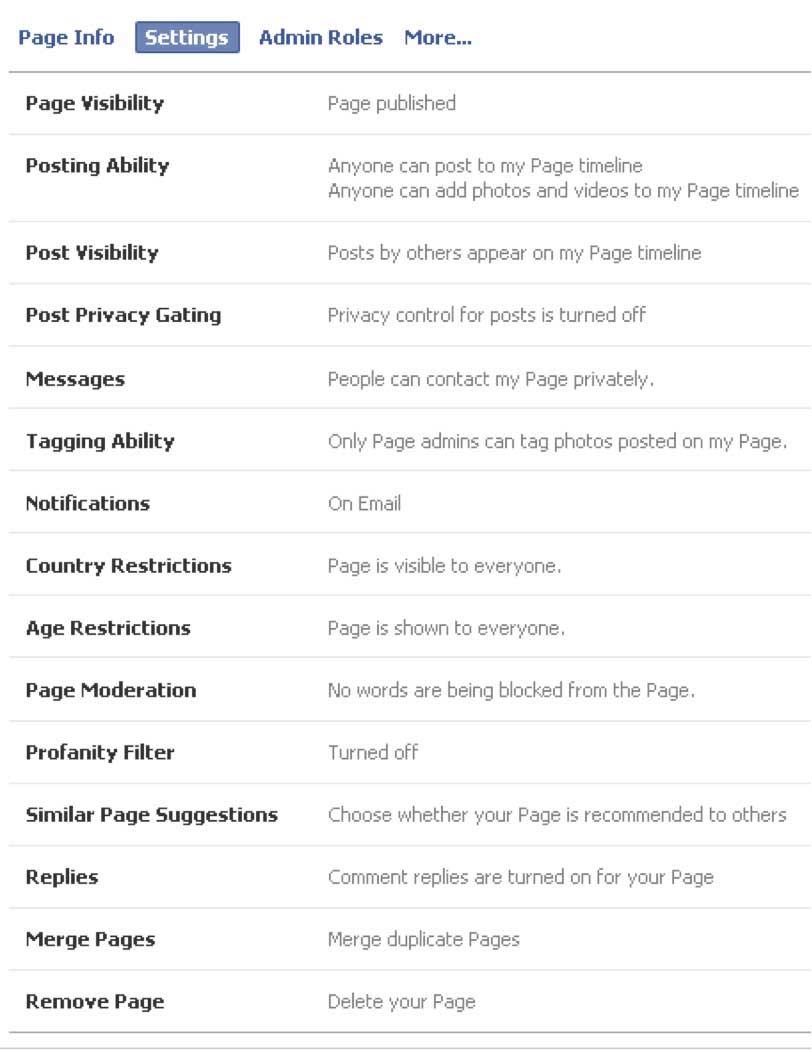
Editing Your Facebook Settings
The Facebook page settings help you manage the operation of your Facebook page. For example, is your page not ready for prime time yet? If you do not want people to see your page then use the Page Visibility setting to change the page from Published to Unpublished.
Here are some other key features that might not be immediately apparent:
Posting Ability: Do you want to allow everyone to post to your fan page timeline? Maybe you do not want visitors to be able to add photos and videos to your timeline. Posting Ability lets you decide who can post what on your page.
Post Visibility: The next question is do you want posts by others to be seen by the public, or hidden. This is a double-edged sword. The positive is that you can have true fans talking about your ability to help clients. However, as attorneys, you do not want a client to slip on a key point for trial or litigation. It is up to you whether you keep other people’s posts public or private.
Post Privacy Gating: Similar to keeping your fans’ posts private; you can decide to keep some of your own posts private and only available to a selected audience. Great if you want to connect with only current clients, or just prospects.
Messages: I would suggest you allow people to message you. Messaging is a private act, which means that the information stays between the two parties. This is good way for prospects to contact you about your services.
Tagging Ability: Do you want to allow fans to tag someone’s name on photos? This means that clients can tag themselves, or identify themselves, on photos you post.
Notifications: Do you want to be notified about fans’ comments and actions via email, or just in your regular notifications area when you log into Facebook?
Country Restrictions: Are you only licensed to practice in the United States? While you cannot restrict fans from other parts of the US, you can set up your page to be visible to US residents only.
Age Restrictions: Are there thorny issues working with minors in your industry? You can set a minimum age for people to see your page. The different age restrictions are 13, 17, 18, 19, 20, or 21.
Page Moderation: Are there any specific words you do not want used on your site? Then set up a word-moderation option.
Profanity Filter: Go one step further than the page moderation with a profanity filter.
Similar Page Suggestions: If you want more traffic, make sure this is turned on. Every time someone fans a similar page they are presented with your fan page.
Merge Pages: Did you start up a similar page, close to your current one? Do you want to merge the two pages together? Then use Merge Pages.
Remove Page: If you decide that your page is no longer relevant delete the page. In the past 6 years on Facebook, I have deleted one page. Do not use this option lightly, unless you want to completely wipe out your entire page with all of your content on that page.
For example, although setting up a Facebook Username is a basic process; your fan page must have 30 or more fans before Facebook will allow you to set up a custom name.
This is why the Page Address line is a bit misleading. Yes, you can use it to create a custom Facebook page name for your new page; however, before you create a custom name, you need at least 30 fans. Also, make sure the name is correct the first time, because Facebook gives you one chance to change the name over the course of your Fan Page.
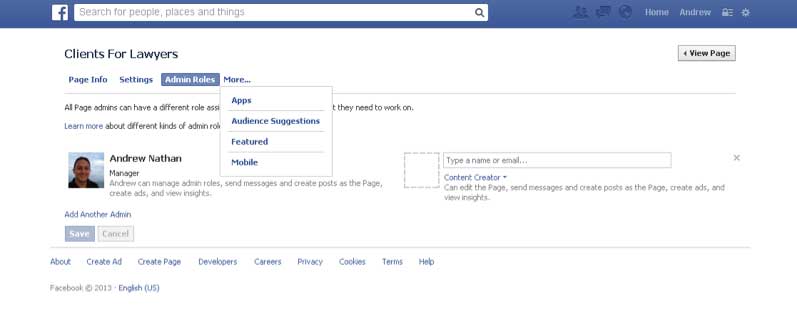
Editing Your Admin Roles
I recommend that any page you run have more than one administrator. Over the past five years, I have seen it all with Facebook pages, from admins losing their accounts for violating Facebook’s TOS to forgetting passwords to partners changing businesses.
The challenge with having one admin for a page is if something happens to your account, you can be permanently locked out. You would not be able to let your fans know about it or to respond to fans’ messages. You need to have a backup. If you run a small practice, talk to a referral partner about doing an admin exchange. Essentially, you will be a second admin in case of emergency, in exchange for them doing the same for you.
Facebook Apps
The great thing about using Facebook pages is that you have a number of apps that can help you run a professional page. You can have everything from photo and video tabs with your company’s media information to Facebook events, contests, and notes (Facebook blog). Check the Facebook app store to explore a plethora of applications ready to use on your page.

Facebook Custom Tabs
Along with the Facebook Apps, there is also the Facebook custom tabs feature. On your new fan page, right next to your profile photo and under your cover photo, you will notice a box that says “Photos”. Next to the box is a drop down menu hidden behind the arrow. When you click on it, you will see an additional 11 boxes.
These are called custom tabs. While they have lost a little of the luster that they had a few years ago after Facebook redesigned their fan pages, they are still a useful tool for business page owners who want to share additional information, or are using these tabs as custom landing pages for Facebook ads.
What we are going to explain below might be a bit more advanced; however, the tools we will use should help you easily create custom tabs for your fan page.
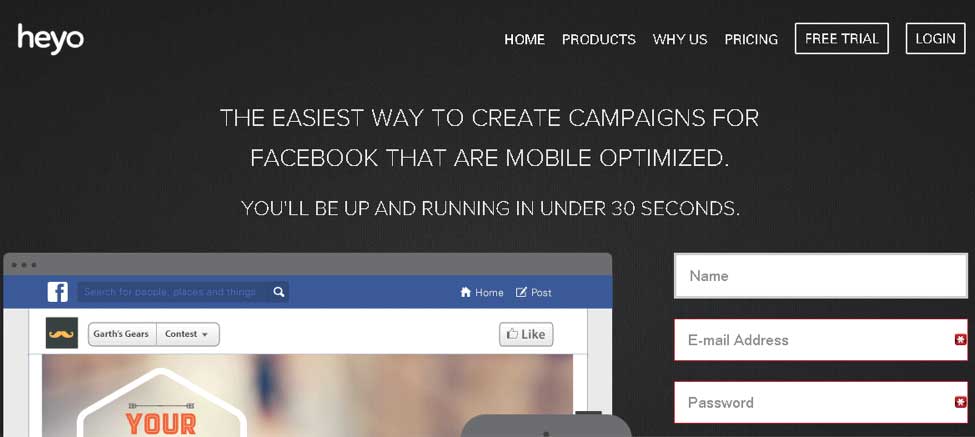
Note: The tool that we use, called Heyo, is a paid service. There are other similar services available, we just prefer Heyo over other options, because of their convenience. The website is Heyo.com.
Step 1: Sign up for a Heyo account using your Facebook account. They have a number of different options. Unless, you have multiple fan pages, sign up for the basic package.

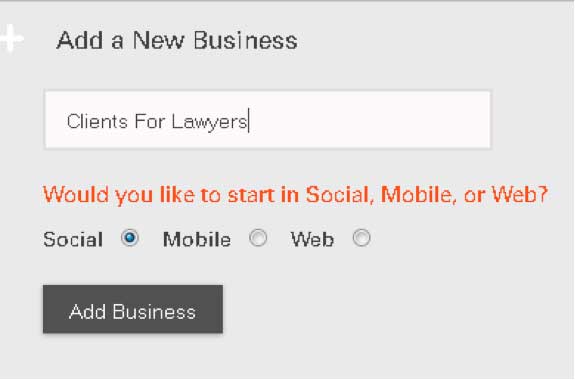
Step 2: Type in the name of your Business page. Since you signed up with your Facebook account, you will have a list of your fan pages that you can add custom tabs. Make sure you have social checked. They do offer mobile and website services, but for our purposes we just need social.
Step 3: Choose the template you want to use. Heyo has a number of different templates you can use to create your fan page. Choose something simple, with not too many graphics, because you will need to upload your own graphics to customize your tab. I sometimes just use a blank template, so I can fully customize the tab to my liking.
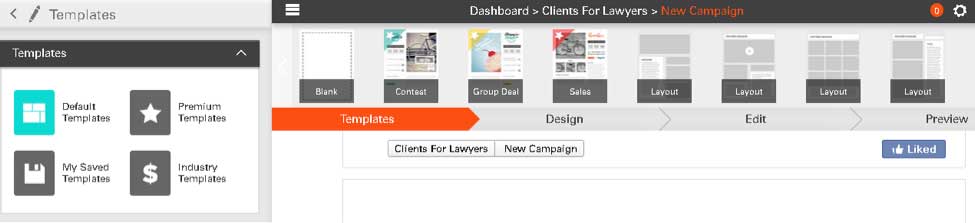
Step 4: Choose your design and background for the page. The middle section has a number of features available for you to use. Otherwise, upload a background image, or choose a background color using the color picker on the left hand side.

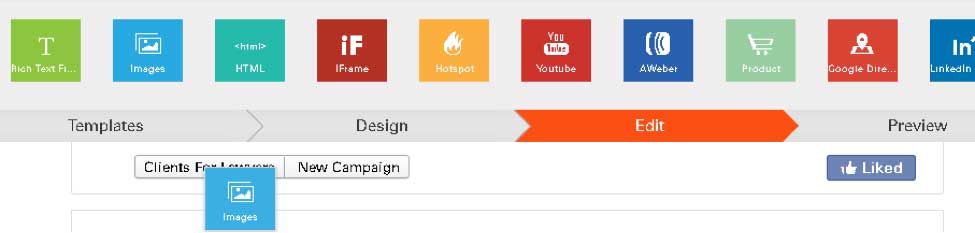
Step 5: Create your custom tab. This is where the fun starts. Now that you have selected a template and background, you can start designing a custom layout for your site. The reason sites like Heyo are so useful is that they provide a point and click interface for designing your custom tab. Need to put an image in your tab? Click the image, and then drag as shown below into the edit area.
Looking to add an email contact form from your AWeber or MailChimp account? Drag it in there as well. Just have the code that Constant Contact provides you? Great! You can copy and paste the code to set up the form.
What about social networks? Already done! You just need to insert a link into the social media box that you choose. With close to 50 options to include at this point, you can do everything from YouTube videos to inserting an iFrame with your website inside.
That is right! You can actually display your website on Facebook. All you need to do is drag the iFrame option into the editor. Then you type in the website URL you want displayed. Since Facebook limits custom tabs to 755 pixels, you need to remember that if your site does not fit within this width scrollbars will appear. Either way, you can now direct traffic straight to your website from the second largest site on the Internet.
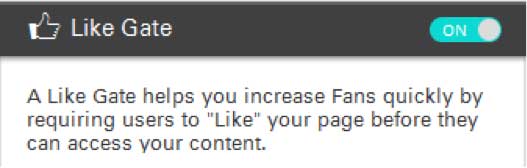
Step 6: If your goal for using this page is to create a landing page for new fans to like your page you might want to add a “like gate”. A “like gate” creates a second version of your page. Using the same features as your custom tab, the only difference is that your goal here is to get Facebook users to become fans. You set up a second page, just like in a website where you have a home page, then an about page. Here the like gate is the home page where potential fans like your page. Then they go to your custom page where they can learn about your business, sign up for your email list, or contact you for more information.
Note: Since you just customized this to your ideal page, make sure to save the page before leaving. Just like you need to save every 10 minutes when you write in a word processor, save your work often on Heyo.
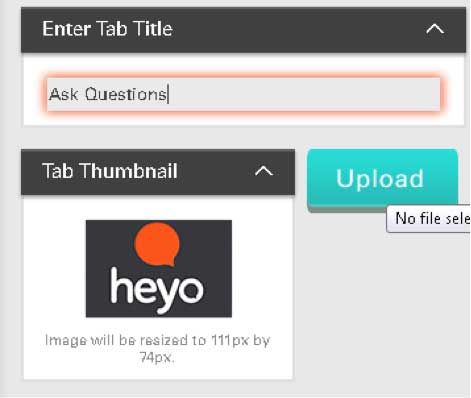
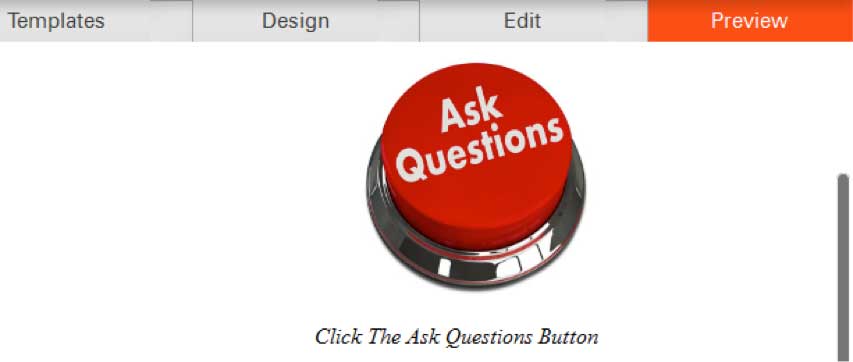
Step 7: Be sure to set up the custom tab thumbnail. Include a custom image for your thumbnail – this will be seen in the boxes area of your fan page.
Step 8: Preview your page. At this point, you want to make sure your custom tab looks right. Double check for any mistakes before clicking publish.
Building Your Facebook Audience
Your fan page is finally up and running. Now you need to build an audience for the page. While there are countless ways to add fans, let’s address some of the basic ideas first. We will go into more diverse ways later in this eBook, such as Facebook ads and integrated marketing. For now, these basic strategies will be useful to get your page off the ground and add some fans.
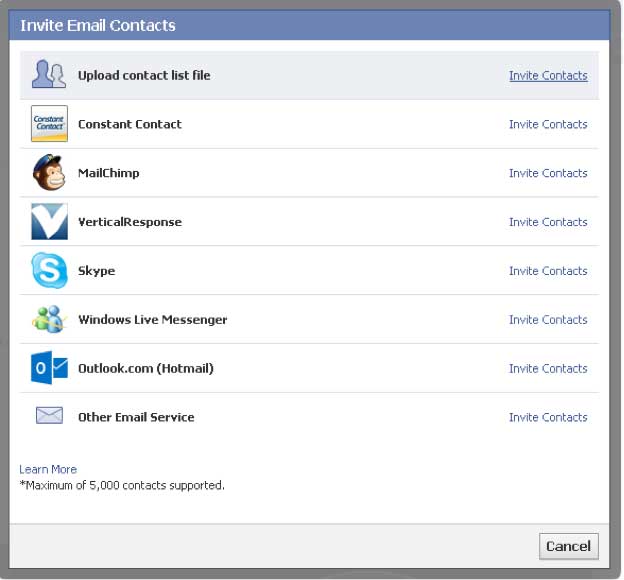
Invite Email Contacts
First, we need to make sure that you do not reinvent the wheel with your fan page. Use your current email list to start building your audience.
Facebook integrates with a number of the biggest email service providers, including MailChimp, Constant Contact, Skype, Outlook, and others.
In fact, as long as you can export your email list into a CSV file, you can import your list on Facebook for an instant influx of fans. All you need to do is invite your contacts into Facebook, and provide them with an intro message explaining the benefits of your new fan page to them.
As long as they know and trust you, they will value the opportunity to fan your Facebook page. Keep in mind that you might want to break up your list if it is not able to upload to Facebook.
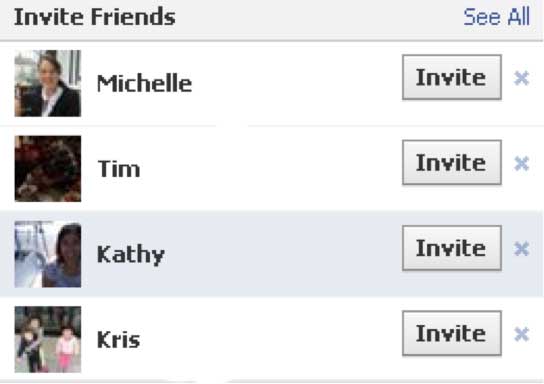
Invite Friends
Once you have invited your email list onto Facebook, start inviting your existing Facebook friends. Most people are connected not only to their personal friends, but also their work colleagues as well. Assuming that the average person on Facebook is connected to 136 people, a good likelihood is that 30% of them either work with you, or are your clients.
Use the invite friends feature to invite friends one at a time, so you can choose who you want to invite to your new page. Click the “See All” link if you are not seeing some of the friends you want to invite.
Facebook Updates
You now have some people following your page, next you need to interact with those new fans. Actually, it would not be a bad idea to have some Facebook updates prior to sending out invites. However, after you invite fans to your page, this becomes a requirement.
While Facebook updates are easy to create, they are hard to write. What this means is that the process of creating an update is very simple. However, writing the right update for your audience on a regular basis can be a challenge. Therefore, we are going to spend more time talking about what to write rather than how to write the updates. If you understand how to type, you will be fine creating basic updates.
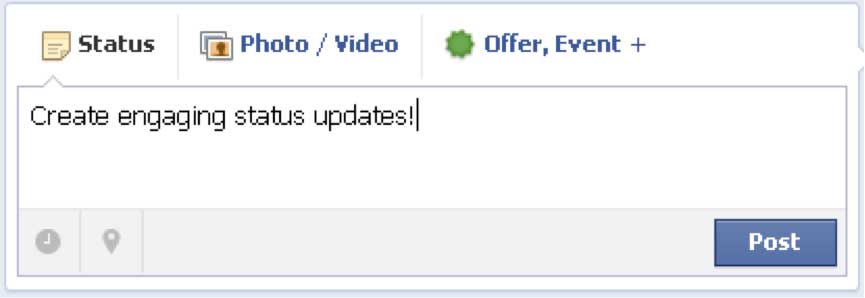
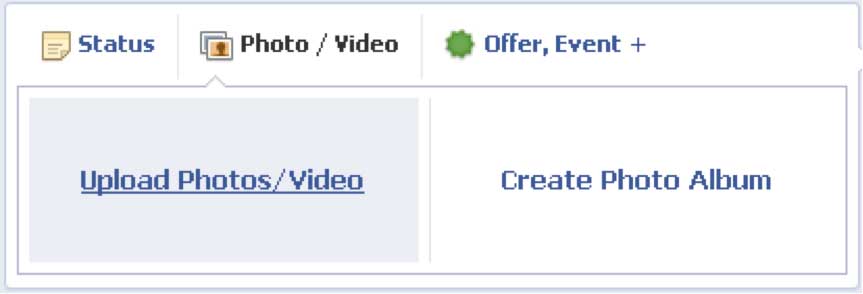
First, to help you create dynamic Facebook updates, you need to understand the different types of updates you can create: status, photos/videos, and events/offers.
Status messages are text updates, photos/videos are image rich updates, while event updates are for any seminars, webinars, networking, and other events that you are hosting. Since most law firms charge a flat or hourly fee and do not use specials and other promotional items, the offer section is not as important for your needs.
Second, once you decide the type of update that you want to write, you need to know some of the options that can really make your status update spin.
One of the biggest advantages for Facebook updates is that you can schedule updates for later. As you can see in the graphic below, you can schedule the update by year, month, day, hour, and minute. The great thing about the Facebook scheduler is that you can create posts in the future, or backdate posts to give your page a longer history.
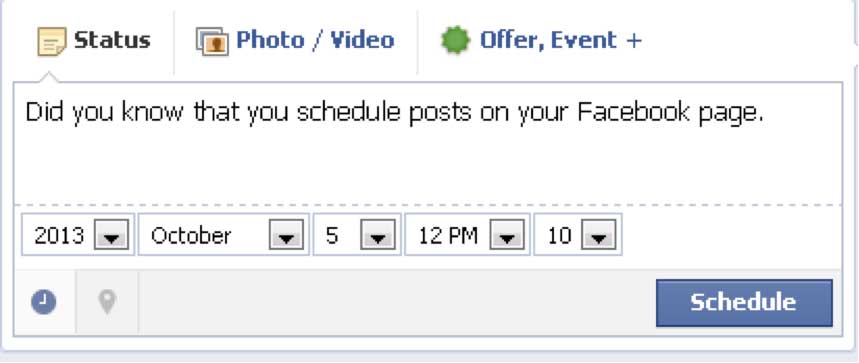
Additionally, there are regular updates and Sponsored Posts. Sponsored posts are paid updates that for a fee will be promoted to a larger audience resulting in greater traction for your posts.
The reason why you should use sponsored posts is twofold:
1. To reach a greater percentage of your fans. If you have 1,000 fans, but only 160 (a lowly 16%) of your fans see each post, then you will have trouble building a large and engaged fan base. However, when you use sponsored posts the update gets displayed in your fan’s newsfeed for up to three days, giving a larger percentage of fans that see your posts. Close to 80% of your fans can see each sponsored post.
2. By doing a sponsored post, you also get your fans’ friends to see the post, as Facebook will reach out to your fans’ friends after they have expended all the views from fans. This could mean more fans, and also more likes, shares, and comments on your updates.
The one caveat of using sponsored posts is that you need to have over 100 fans to use this option. The reason for this is simple. If you do not have enough fans, then Facebook cannot share your post with enough people to make it worth your money.
Third, now that we understand the difference between the two update types and how to use Facebook updates, we need to create dynamic posts on a regular basis.
Keep in mind that you need to be 80% educational and 20% promotional with your updates. This way, you will encourage your fans to keep coming back, while you get the benefit of having the promotional atmosphere you need to bring in new clients.
Here are 14 types of updates you can create to increase engagement with your fans.
- Ask questions. “What do you think of the new XYZ law about ABC?” or “Have you ever found yourself in (this) situation?” Questions elicit responses. The better your questions, the better response you will get from your fans.
- Inform your fans. Chances are that your clients do not keep up on legislation as much as you do. It’s simply not their job in most cases. That is why you must educate them. When a new law passes that could have ramifications for your fans let them know about it, and how they should act on this information.
- Inspire them. Too many fan pages provide the same droll news information over and over again. Instead of just providing them with news, also provide them with ideas.
- Quotes! While we are on the topic of inspiring others, use quotes from people who inspired you. Have a short blurb about the quote, and then use the words of wisdom from leaders.
- How-to posts! Let your fans know how to protect themselves against identity fraud. How to keep their estate up to date. When they need to talk to an attorney about filing corporation forms. Hot to not break stringent FTC laws when posting on Facebook, like, every time you advertise you use a #ad tag for disclosure. What you can and cannot share in your social media posts.
- Let them laugh with you. I hate to say it, but there are a million lawyer jokes out there in the world. Some are deserved, others not so much. Poke fun at yourself every once in a while with a good lawyer joke. It will loosen the tension of talking to your fans, and also encourage them to talk to you about issues. In other words, show them you are a real person.
- Use images when appropriate. Remember, you can upload images onto your fan page. Sharing photos of your company, employees, and events is great. Also, if a client provides you with a testimonial and lets you use their name, then take a picture with them next to the testimonial.
- Video testimonials. Better yet, videotape the testimonial. Have them talk about your services for 30 seconds, and then let them share information about their business for the rest of the time. They will be grateful for the chance to tell people about what they do, and you get a live testimonial to share with your fans that your client approved of.
- Share events. We will discuss this more in-depth next. However, for now, keep in mind that sharing events before, during, and after the event on your Facebook page is huge.
- Say thanks every once in a while. Tell your fans how much you appreciate them. Even better, give a random fan a gift certificate to Starbucks or Staples. Something that would be useful for a business audience.
- If you can run contests for your practice, then run them. Facebook contests are amazing for additional fans, traffic, engagement, and prospects. There is a reason why every year since 1986 McDonalds has run the Monopoly contest. It works! Make sure before running a contest that you follow all the Facebook rules and regulations and do not violate any FTC regulations or State Bar rules.
- Promote your firm! That is why you have a fan page after all. Do not be shy about promoting your business from time to time. However, being over-promotional can kill your business online.
- Promote your other social networks, such as your LinkedIn Company and Profile page, Twitter account, Yelp, Google+ Local, and any other page you might have online.
- Holidays! Everyone loves their holidays. Every month with the exception of maybe August, you can find a holiday to talk about with fans. Even in August, you have summer vacations and the start of the school year. Happy Thanksgiving! Merry Christmas! Did you enjoy your 4th of July weekend? It might be the Facebook fan page equivalent of talking about the weather, but people always have an eye on the next holiday.
- Bonus: Give them a bit extra! How can you give your fans more? The more value you provide your fans with, the more you will receive from them.
Facebook Ads
Now that your fan page is up and running, we need to hyper charge your quest for qualified fans. One of the fastest ways to do this directly on Facebook is through Facebook ads. While this is a paid method of marketing, it is still a very effective one for many law firm practices looking to find specific clients.
The process we use below will walk you through the steps required to create Facebook ads. However, it is your responsibility to target your ads specifically to your demographic. For example, if you run a real estate practice, and do not deal in class action or business litigation law suits, you will want to target real estate professionals, instead of executives and managers.
Understanding your target market is the key to success with Facebook. The more you know how to market to your target group of prospects, the more they will appreciate your ads. This is very important, because Facebook ads traditionally do not have high click-through rates. Instead, creating a dynamic page requires you to use your head when marketing.
Setting up a Facebook Ad
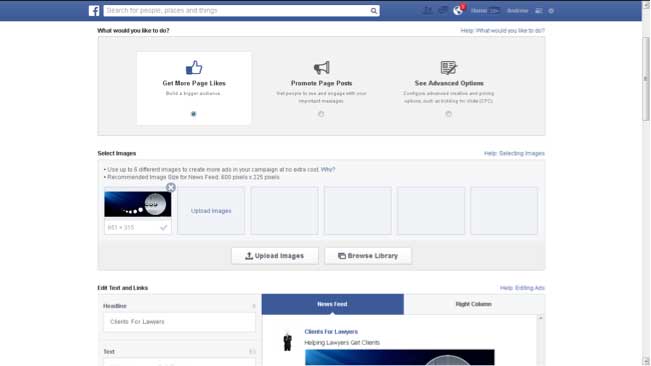
Step 1: Get more page likes as Facebook puts it. The reason you are creating a Facebook ad campaign in the first place is more than likely to obtain more Facebook likes for your page. So, tell Facebook that you want more fans. To create a Facebook ad, go to Facebook.com/ads
First, set up your campaign. Include a clean graphic along with the text. Depending upon the type of ad you ultimately choose you might not have a choice in deciding the text for the Facebook ads.
Note: Make sure that whatever image you use is relevant to your ad. Also since your ad will be to the left of the text, have the image face right. That way, the image will be subliminally telling viewers to check out what you have to say.
Step 2: Target your ad to the right audience.
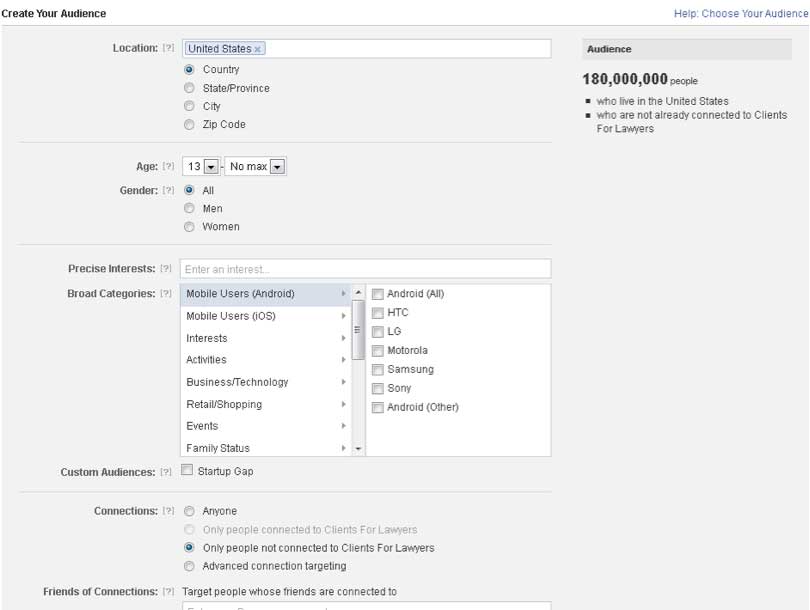
As mentioned earlier, targeting is everything with Facebook ads. The right message directed at the right audience makes all the difference. To do this, you might need to play around with different ads to find out which ones work best with your target audience. The “Create Your Audience” section allows you to create a custom audience for your needs. You might want to set up multiple ads using the following criteria to effectively determine who your target market is, and what they want from your services.
Location: Is your business linked to a specific geographical location? For example, what states are you licensed to practice law? If the answer is Oregon and California, then check off those two states.
Conversely, if you have practices or partner firms in other parts of the world, then include those in your fan page searches when relevant.
Age: Do your clients need to be 18 to sign paperwork from your firm? Maybe your ideal target is baby boomers. That would make their ages approximately 49 to 67. Since you are in the legal profession, be careful of discriminatory targeting.
Gender: Lawyers should not need to target only men or women. The only exception for this might be divorce attorneys who only work with wives or husbands. That being said, avoid using this as a targeting measure.
Precise Interests: What is your target market specifically interested in? Are you a sports agent looking for football players? Maybe you are a real estate attorney who wants to speak with Realtor referral partners. What are your ideal clients interested in enough for you to want to work with more of them on a regular basis?
Broad Categories: This goes along with precise interests, however, think about your prospects as a wider group. Are they Android users maybe? Or do you work in Silicon Valley, where everyone needs to have the latest iPod, iPad, iPhone, iTouch, iWhatever?
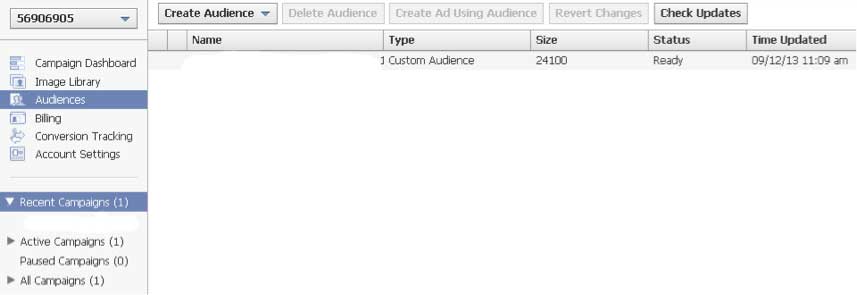
Custom Audiences: Check the section below on the Power editor for more information about this section. Note: You need to use Google Chrome to use the Power Editor.
Connections: Who can see this ad? Make sure that you set this to at least “Only People Not Connected” to your page. If you set this at only your current connections then you will not be able to add new fans, because only your current fans will see your ads. The other option is to let anyone see the ad. This is not advisable for targeting an audience. Check “Only People Not Connected” to your page, so you do not bother current fans with your ads.
Friends of Connections: Another nice touch would be to add the filter Friends of Connections. This means that the only people who will see your ad are friends of your current connections. Because this works on an algorithm, which shows how many of your friends are fans of a page, I recommend waiting until you have at least 100 fans to do this.
However, this is a great touch for those interested in using the power of social influence to gain more fans.
Step 3: Set your Campaign Pricing and Schedule. Once you have completed targeting your new fans, then set your ad’s pricing, so you can budget correctly.
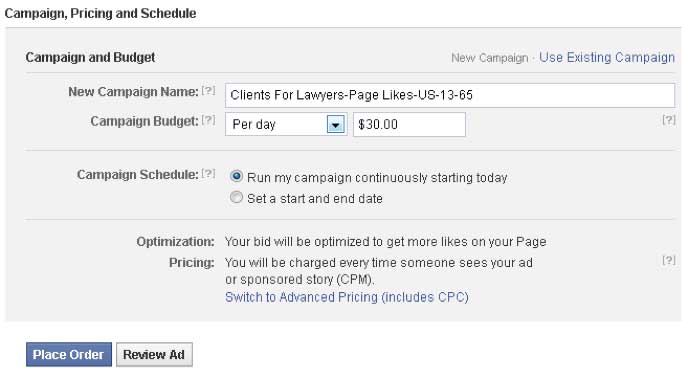
Here are the characteristics you need to keep track of for your pricing and scheduling:
Campaign: Double check that you are spending money on the right campaign. With all the options available on Facebook, it is easier than you think to make simple mistakes like this.
Campaign Schedule: You have two options, create an indefinite campaign, or schedule your campaign for a certain time period. Because Facebook campaigns have a tendency to take your money faster than you can say “like me” you would be better off setting campaign dates.
An experienced internet marketer once told a story about how they forgot to set a campaign end date a few years ago. His campaign went over, and in a week he owed $7,000 to Facebook. To avoid this, set up strict campaign deadlines and daily maximum budgets. Your initial budget should be somewhere between $10-$25 per day when you start. The daily minimum is $5.
Optimization and Pricing: Next, figure out how you want to optimize your pricing. Facebook has a few options available. You can do Cost Per Click (CPC) or Cost Per Thousand (CPM) pricing. If you run a campaign through the power editor, Facebook will optimize your campaign as a CPC campaign.
Here is the difference. Cost Per Click means every time someone clicks on your Facebook ad, you pay for that click. The price can vary from $.10-$5 depending upon the campaign audience you were looking for earlier. Remember to not confuse clicks with likes. Just because someone clicks on your ad does not mean they will like your page.
Cost Per Thousand means you pay for every 1,000 views on your campaign whether the person clicked on your ad or not. The great thing about CPM campaigns is that you might spend $.1-$1 on every thousand views. This means if 1,000 people click on your ad, then you effectively spent $1 for this marketing. However, the downside of this is that if no one clicks on your ads, you could end up spending more money for no actions on your ads.
The key with setting up a good campaign is testing. Pricing is a key part of that process. Play around with different pricing options to see what works best for your campaign. This is something you will need to continually tweak.
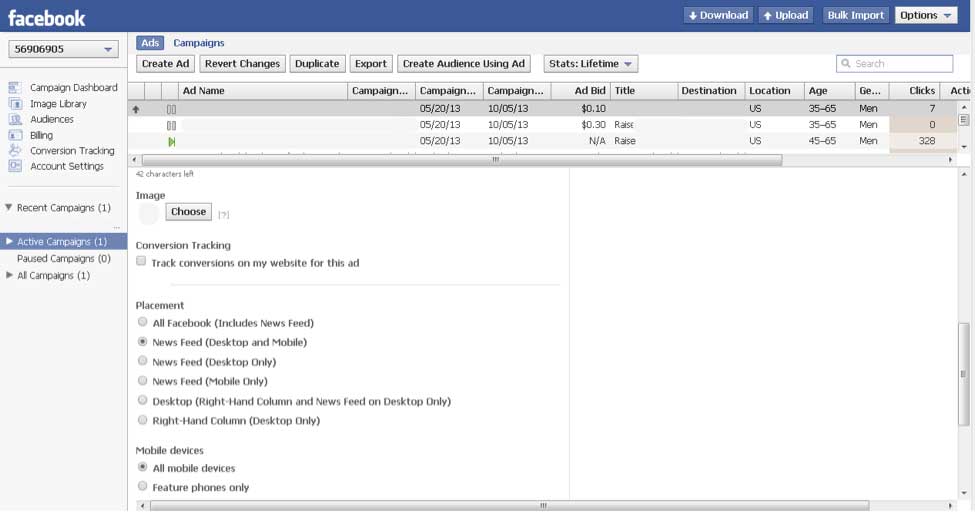
Step 4: The power editor can be your friend. One of the most powerful, new tools that Facebook released in the past year is the power editor. The power editor is a feature that can only be used in Google Chrome at this point. However, with the right marketing mix, I have seen clients using this tool go from adding a few hundred fans to a few thousand fans.
The key to the power editor is the custom audience and the ad placement.
Custom Audience: Do you have a large email list that you want to leverage on Facebook? Then the custom audience tool is ideal for your purposes. You can upload lists of up to 25,000 into the custom audience uploader. Then Facebook will match the emails up to Facebook users. The power here is that about 30% or more of your list generally comes back as Facebook users.
You can now target your ad to Facebook users who are in your email list.
Ad Placement: The second tool in the power editor is Ad Placement. Traditionally, Facebook only allowed ads in the sidebar underneath the notifications. This worked at first, but as Facebook’s advertising progressed many of the users stopped looking at the ads in the sidebar.
To combat that, Facebook started testing Newsfeed ads last year. These ads are more powerful than the traditional ads, because they show up in the newsfeed that is the central feature of Facebook. This means that you will have higher click through rates with these ads. Now, at this point Facebook restricts the types of ads available as a Newsfeed ad. However, the added benefit of using these ads far outweighs the disadvantages of limited advertising functionality.
Facebook Events
Do you host events for your firm? Then use Facebook to get additional publicity for the event. Facebook’s simple event system integrates with Facebook updates, and also has a tab in the boxes underneath the cover photo.
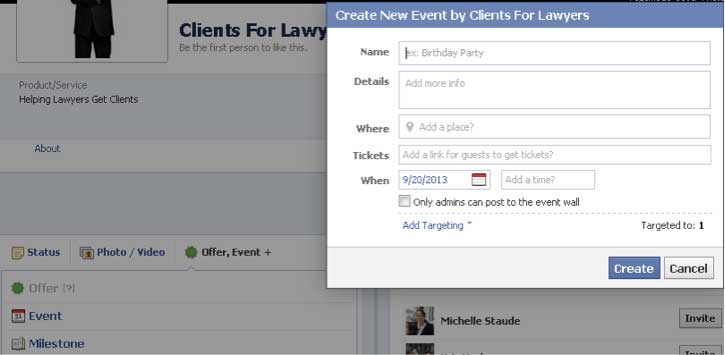
When you set up an event, you need to fill out the following fields.
Event Name: What is the name of the event?
Details: Give a full description of your event. Is it a seminar, a networking event, a cocktail party? Do you have anyone speaking at the event? What is special about this event? Is it an annual or monthly event? Also, let them know what they need for the event, and what steps they need to take to sign up. Paint a picture for your Facebook fans to join you.
Where: Provide a full address. Sometimes Facebook can link up the location to a Google maps page.
Tickets: Is this a free or paid event? Do people need to register in advance? Send them to a URL where they can register for the event in addition to listing themselves as yes, no, or maybe on your Facebook events page.
Date: Provide the start and end time. Also, you might want to include time zone information when possible. This could go in the details section.
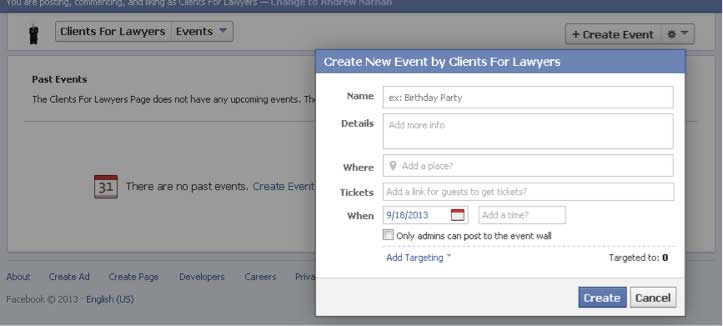
Example of Setting up a Facebook Page under the Facebook Events Tab
Example of Setting up Events under Facebook Updates
Do you host events for your firm? Then use Facebook to get additional publicity for the event. Facebook’s simple event system integrates with Facebook updates, and also has a tab in the boxes underneath the cover photo.
When you set up an event, you need to fill out the following fields.
Event Name: What is the name of the event?
Details: Give a full description of your event. Is it a seminar, a networking event, a cocktail party? Do you have anyone speaking at the event? What is special about this event? Is it an annual or monthly event? Also, let them know what they need for the event, and what steps they need to take to sign up. Paint a picture for your Facebook fans to join you.
Where: Provide a full address. Sometimes Facebook can link up the location to a Google maps page.
Tickets: Is this a free or paid event? Do people need to register in advance? Send them to a URL where they can register for the event in addition to listing themselves as yes, no, or maybe on your Facebook events page.
Date: Provide the start and end time. Also, you might want to include time zone information when possible. This could go in the details section.
Integrate Facebook with Other Marketing
Finally, Facebook does not exist in a vacuum. Remember to integrate your fan page with other aspects of your marketing for ultimate exposure for your business.
Think of ways to integrate your current marketing strategy, like events you might hold outside of Facebook, with your Facebook presence. For example, if you are an avid networker, including your Facebook Page URL on your business card is a great way to get new fans.
Similarly, your Facebook page should be directing people to your other marketing efforts. If you run TV ads, share the ads with your fans, so they can in turn share your ads with their friends. This might even be a good time to start using YouTube, since the video social network is a great place to share videos. Then you just need the YouTube video URL to share your video on Facebook. Or an even better idea is to use a Facebook app to create a custom Video tab with your TV ads.
Facebook Fan Page Summary
Marketing your business through Facebook requires persistence. Your page will not be churning out business opportunities or prospects in a day. However, with the information we provided above, you can knock out a great Facebook Fan Page that delivers long-term value to your business.


